Bridge Construction
We had a bridge going over a small stream in the back yard. HAD. Two years ago:
Because it was heavy (it's about 16x8, made of treated wood, with some steel and 12x12 timbers on the underside -- i have no idea how it floated), nothing i had could drag it back, certainly no without destroying it.
I paid my kids to disassemble it - they spent probably 12 hours each with crowbars and a sledge hammer. They stacked the wood and put the steel in the barn. Awesome.
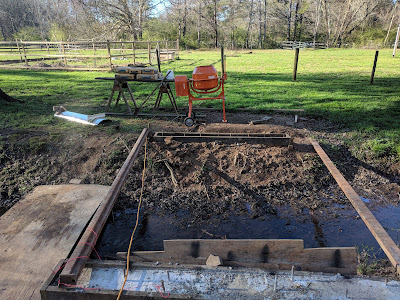
I used some of that wood to build forms for a new concrete footer on each side -- there were some concrete blocks it had been resting on, but this time wanted more.
As usual the hardest part is measuring and leveling stuff. At least the stream was low, but schlepping stuff back and forth is hard.
I got a harbor freight cement mixer, since i was going to be doing probably 1500lbs of concrete and mixing by hand (e.g. with a hoe and wheelbarrow) is hard.
One notable design flaw with it is that it dumps directly under itself. Fine if you can straddle the place you're pouring, but not fine on banks of streams. So i built it a little chute with a stove pipe and 2x4 scraps:
Schlepping the mixer across the stream was no peach either -- it weighs ~100 lbs -- but it got the job done.
You can see some of the steel beams (from the previous bridge). I will reuse those and add one other that we found in the pasture. I don't want to drill through the steel - that sounds hard, so i will just put in little concrete anchors and attach the wood to the concrete. The steel will be sort of wedged in between providing support, but not really securing the wood to the concrete.More steal on, and some wood members bolted to the heaviest steel c-channel. these will secure the decking.
Decking. You can see through the gaps that I actually added some more wood spanning the gap. So in addition to the 6 steel pieces, there are 7 wooden beams that go across. The steel is plenty to support, the wood is mostly just to hold it all together.
The boys took turns drilling pilot holes and driving screws. They were a huge help.
The underside, showing the bolts holding 2x6s to the steel c-channel.


Comments
Post a Comment